In this article, we will learn how to create a User profile in WordPress.
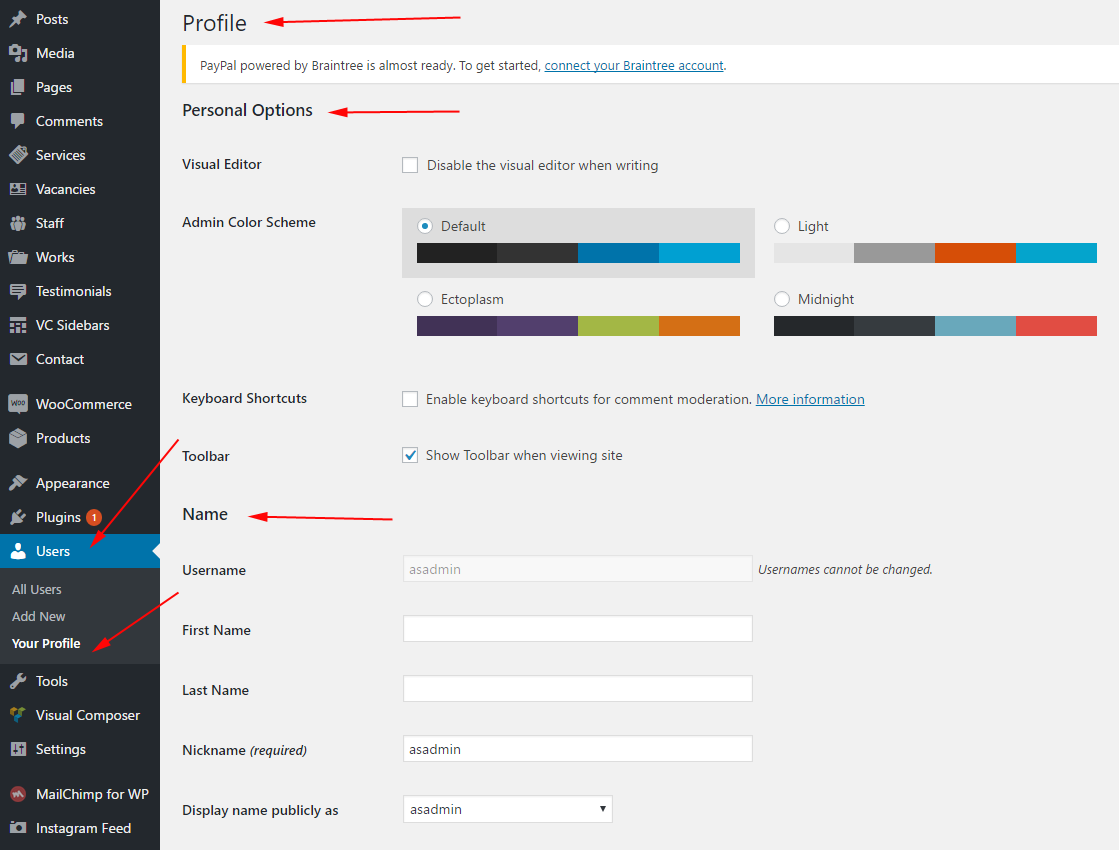
Click on Users → Your Profile from the left navigation bar.
You will see the screen with following :

Personal options
- Visual editor − Tool for create, format, or edit your post. If you disable this setting, you won’t be able to use this option.
- Admin color scheme − Change the color of your WordPress site.
- Keyboard Shortcuts :Windows and Linux use “Ctrl + letter”, Mac uses “Command (⌘) + letter”.
Ctrl + key
Letter Action c Copy v Paste a Select all x Cut z Undo y Redo b Bold i Italic u Underline k Insert/edit link Alt + Shift + key
The following shortcuts use a different key combination: Windows/Linux: “Alt + Shift (⇧) + letter”. Mac: “Ctrl + Option (alt ⌥) + letter”. (Macs running any WordPress version below 4.2 use “Alt + Shift (⇧) + letter”).
Letter Action n Check Spelling (This requires a plugin.) l Align Left j Justify Text c Align Center d Strikethrough r Align Right u • List a Insert link o 1. List s Remove link q Quote m Insert Image w Distraction Free Writing mode t Insert More Tag p Insert Page Break tag h Help x Add/remove code tag 1 Heading 1 2 Heading 2 3 Heading 3 4 Heading 4 5 Heading 5 6 Heading 6 9 Address - Toolbar − If you check this box, the Toolbar will be show when viewing WordPress site.
Name
- Username − Your user name.
- First Name/ Last Name − Your first name and last name.
- Nick name − Nick names if any.
- Display name publicly as − Check the box if you want your name to be displayed publicly.
Contact Info
- E-mail − Valid e-mail address.
- Website −Your web address.
About yourself
- Biographical Info − Some details about you.
- New password − Enter a password of your choice.
- Repeat password − Re-enter the password for authentication. Password must contain 7 characters.
- Your photo − You can upload an image . This will be your profile picture.
Click on Update Profile to save changes.